Buyer’s Guide For Creating Your Own Web Video
 I frequently get questions regarding what video cameras, microphones and various software and hardware pieces people can use to create their own web or YouTube videos. So what better place to explain it than on the web?
Now before we get started, these are just suggestions for products I have used, want to use or have read extensively about. Also, for many of the products the links are affiliate links which I make a small commission off of, so if you find the information helpful, I appreciate you purchasing them via the links.
Finally, don’t forget, it’s the message that’s important. If you have the highest quality equipment and no message to get across, your videos won’t be valuable. If however you have an incredibly important message and you record the video on your smartphone, just to get the message out, it will still have a tremendous impact if it provides true value.
The Basics
The basics for creating any video, outside of the message itself, are the audio and the video. While it’s important to get a quality picture, you will lose more people with poor audio than poor video which is why I believe it’s essential your video camera has an external microphone port allowing you to connect a quality microphone.
The Video Camera
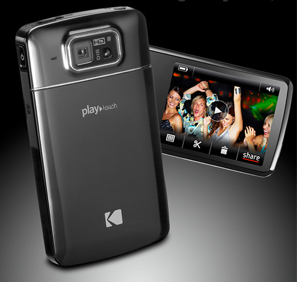 This is why I recommend the PlayTouch
 series of cameras from Kodak. They can record up to 1080p (HD resolution), they can take up to 5MP still shots, they have a dedicated microphone port, they are smaller than many smartphones so they easily fit in a pocket, they can do minor editing on the camera and they are under $200.
The current version is the Zi10 and I now use this for almost 90% of my videos I create. It record to SDHC cards which you can purchase in sizes from 4GB to 32Gb allowing you hours of recording time and is an easy way to transfer video to most PC’s or Mac’s. I actually have multiple SDHC cards, so I can swap when necessary or if I run out of space.
Another great feature of the camera is a port on the bottom allowing you to mount the camera on a standard tripod. The higher the resolution you record in, the more visible shaking and movement can appear in your videos. Some video editing software can remove or reduce shaking, but starting out without shaking can make a tremendous impact on your quality and having your camera mounted on a tripod can make your videos rock steady.
The Microphone
Quality audio helps keep people listening. Their eyes may stray from the video, but they keep listening, and having clear full range audio that isn’t muffled (like many home videos) and that doesn’t constantly change volume levels will help your videos achieve a level of professionalism. Quality audio also doesn’t need to break the bank!
I prefer a clip-on microphone for audio as it allows me to position it properly on the speaker’s shirt and it keeps the volume level consistent. It also allows me to hide the cabling which also contributes to the look of the video.
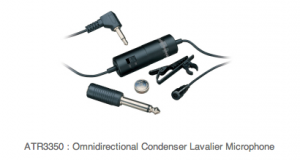
One clip-on microphone that consistently gets rave reviews from many video creators is the Audio Technica ATR3350, the only problem is I’m in Canada and it’s hard to find up here. The previous link will allow you to buy it out of the US and have it shipped to almost any country and at less than $30 it’s a great value.
It plugs directly into the camera and includes a 6m (20 foot) cable, giving you plenty of room to set up a shot or move around. Overall it’s a great microphone and would have been my first choice on a starting budget.
However, if you’d rather search for your own rather than wait, I found the clip-on microphone I currently use at the Sony Store for just under $50. It’s only shortcoming was the short 2m cable, so I simply purchased a 6m extension to extend the length.
So with the camera and the microphone, you are set to move forward and create your initial videos, however there are a few other options you should consider.
Tripods
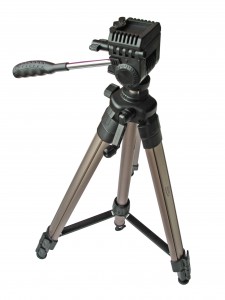 You can pick up a simple tripod
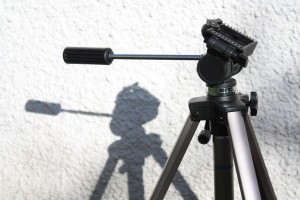
 from a local camera store or online and if you plan on shooting much video it is a highly recommended accessory. They will allow you to shoot on your own without assistance, they will provide steady shots improving the look of your video and they are easily height adjustable so you can set the proper height to provide impact.
However, not all tripods are equal and it may be worth spending a bit more to get the proper features. As you move up the pricing scale the most obvious change is the stability of the units. Comparing a $25 tripod to a $200 tripod is like comparing a Yugo to a Tank. The feel of a higher quality unit definitely comes through and when the tripod is fully extended you can see the extra stability it can provide.
If you are sitting in one spot shooting stability will be your main concern, if however you will be shooting moving objects and need to pan, you will also need to consider the type of ball head the unit uses. Higher quality units can provide a very fluid movement, where as cost effective solutions seem to stick as you pan side to side creating jerking motions in your filming as they stick and release. This may not be a consideration for everyone, but should be noted if you are looking for a true multi-purpose tripod. You can expect to pay $50 to $150 for a good quality telescoping tripod.
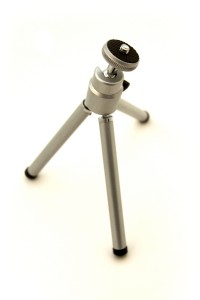
I actually use two different tripods, depending on what I am filming and how many cameras I am shooting with and my second tripod is actually a mini tripod that is only about six inches tall. It golds up into a tiny bundle and is incredibly convenient when creating quick on the go videos. I’ve used it to film in my vehicle (mounted on the dash), on site (stuck on a shelf) and even in my home for multi angle dual camera shots.
While not very flexible as far as height or angles, they are convenient for quick use. Also, they are typically less than $20, so it might be a good option as backup.
Lighting
One of the big differences between $200 video cameras and $2,000 cameras (other than price!), is how they deal with low light situations. Higher quality cameras have lenses and electronics that allow them to operate with less light than lower priced cameras. This doesn’t mean lighting isn’t important for all cameras, it does mean it is more important for you to be aware of though if starting out with my recommendations.
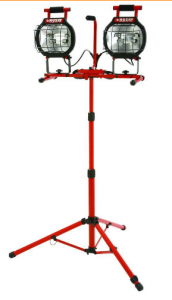 If you are starting on a budget, there are some very cost effective solutions to ensure you get high quality results and some of these I still use to this day. One of my earliest purchases was a simple construction grade multi light halogen work lamp from Home Depot, similar to the picture to the left.
While it’s not something I would take to client’s sites, it’s worked phenomenally well in my in-house recording setups and it was less than $60 and it provides the majority of my front lighting.
It’s height adjustable and the two lamps help diffuse the shadows better, the only downside, it’s hot, which can cause some issues on long shoots. To help complement the big light, you can also add a couple floor standing units that you would use to either side, further eliminating shadows.
The final piece of the puzzle is an overhead light to provide separation from your subject’s head and the background. This helps create an almost halo like glow in many videos which creates more depth in your shots. If you are setting up a small studio of your own and you want to keep the budget tight, you can invest in a fluorescent light fixture that you mount on the ceiling above where you will record. The important point being, replace the standard stark white bulbs with the slightly more expensive natural or full spectrum bulbs for a more natural lighting effect.
If your budget is a bit larger, one place I recommend you look is a company called TubeTape.com. They have numerous lighting kits available that fit most budgets and for around $300 US, you can get a great kit that’s even portable! Here’s a link that includes a video to give you some ideas, 2400 Watt Cool Flo Light Kit.
Green Screens
If you’re not familiar with green screens, these are special backgrounds that motion picture studios have used for years to create special effects. The technology has improved so much in the last several years that you commonly see this every night when you watch your local TV weatherman standing in front of the weather map on TV.
In fact the technology has improved so much, it’s not too hard for you to create green screen videos in your own studio and for a very low cost. The technology behind it is very simple. You need to have a single colour background that you film in front of. This background is typically a bright green and is where the name green screen came from, but it can also be found as a blue screen.
The next important part is having software that allows you to remove that single background colour and replace it with an image or another video. Several years ago, this type of software cost thousands of dollars, but now is included in video editing software that costs less than $100 such as iMovie on the Apple or Sony Vegas Movie Studio for the PC.
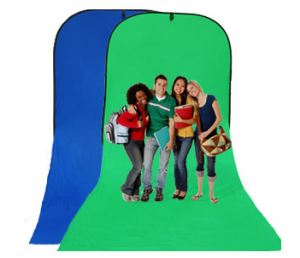 To set up your own home studio on a budget, you can simply purchase a large sized green screen background from a company like TubeTape, for less than $100 and then mount it on a wall. If your budget is slightly larger, you can look at portable flex screens and larger size screens like the ones found here, Extra Large Flex Backdrop. There are some excellent options for around $200 out there.
Hopefully this is enough information to get you started and give you some ideas of what you need to spend to get started for both a beginning budget and as you move forward.
If you have any comments or ideas and thoughts to add, I would love to hear them and I will be adding to this list as time goes on. Happy filming!
